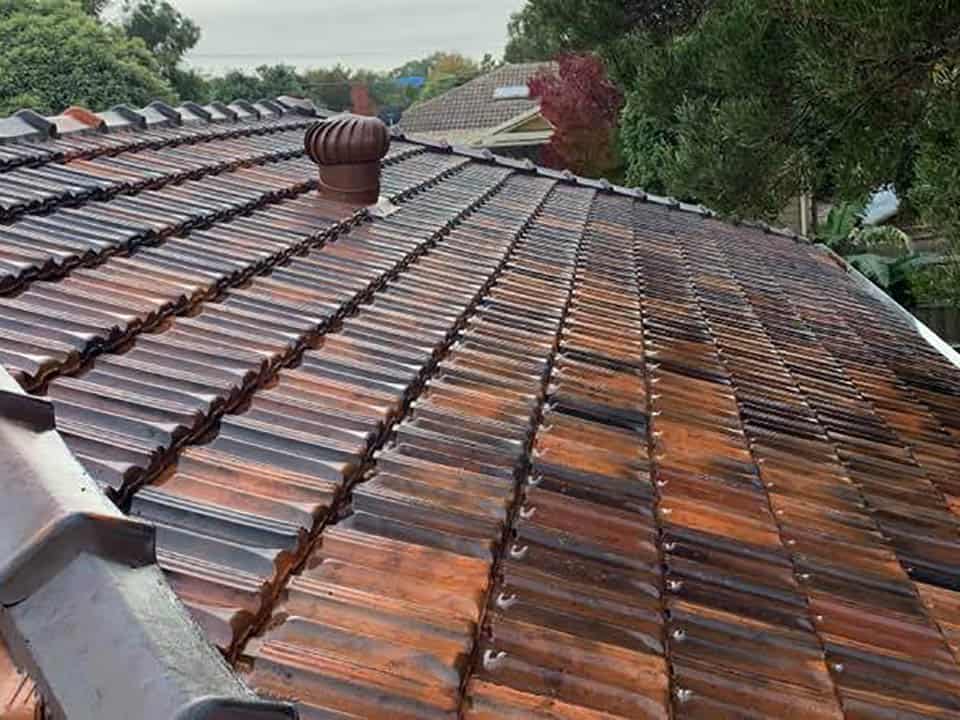
Cracks, chips, and shattered pieces – it sounds like a crime scene investigation but we’re talking about something much closer to home: your tile roof.
Believe it or not, the beauty and durability of this roofing option comes with its fair share of wear and tear. Damage can occur due to age, harsh weather conditions or even mishaps during maintenance; but before you lose your cool over these unsightly blemishes, remember that you wield the power of remedy.
In this blog post, let’s unravel tile roof repair with a step-by-step guide on how to patch and fix broken tiles.
Repairing a tile roof involves several steps. Start by identifying any damaged tiles and removing them carefully. Then, clean the area thoroughly and replace the broken tiles with new ones that match. Use roofing cement or fibre cement to fill in cracks or holes, ensuring proper sealing.
It is recommended to consult professional roofing contractors for expert advice. Especially if you are unsure about the process or uncomfortable working at heights. Our team of professional roofers offer tailored solutions for your specific roofing needs, while ensuring safety throughout the entire repair process.
Common Problems in Tile Roofing
Tile roofs are known for their durability and aesthetic appeal. However, just like any other roofing material, they are not entirely immune to wear and tear.
Some common tile roof problems include damaged tiles, fibre cement deterioration, and masonry problems. The good news is that most of these issues can be easily fixed with proper maintenance and inspection.
For example, a broken tile may allow water to penetrate the underlayment and cause leakage to occur beneath the tiles. If left unchecked, this could lead to severe water damage on ceilings and walls.
In light of these issues, let’s look at how to identify cracked and missing tiles.
Identifying Cracked and Missing Tiles
Cracked or missing tiles are among the most common roof repair problems homeowners face. These issues can be caused by different factors like falling branches or harsh weather conditions. Identifying these issues at an early stage can save you from costly repairs down the line.
The first step in identifying cracked or missing tiles is through regular visual inspection. Roof inspections should be done every spring, winter and fall season when harsh weather might have caused some damage.
When inspecting your roof follow this inspection checklist:
- Check for any visible cracks, chips or missing tiles.
- Search for spots where sunlight is passing through since it’s a sign of underlying holes or cracks.
- Identify algae growth stains as they indicate moisture accumulation potentially caused by broken tiles.
It’s essential to avoid walking on your tile roof if possible because it poses both a safety risk and the risk of breaking more tiles, which will require extra time and expense to replace.
If you notice damaged tiles that need replacement, consider calling a professional roofing contractor with a team of experts like Sandhurst Roofing. Who can safely access your roof without causing further damage.
If your home has an older roof or unique design, it’s best to consult professional roofing contractors for advice on how best to proceed and receive tailor-made solutions based on your home’s needs.
Assessing Leaks and Damage
Tile roofs have long been valued for their aesthetic appeal, durability, and longevity. However, one common issue with tile roofs is leaks resulting in water damage. While some leaks may be evident, others may go unnoticed until significant damage occurs. Before repairing a tile roof, it’s essential to examine the extent of the damage and assess any hidden leaks.
To start your assessment correctly:
- Look for any visible signs of damage. Are there any missing, cracked or broken tiles? Make a note of all damaged tiles that need replacement.
- Check for water spots or stains on your ceilings or walls, as these indicate water infiltration caused by a leaky roof system.
- Climb up onto your roof and inspect tiles carefully from above checking for breaks, holes or gaps that allow water infiltration beneath roofing materials.
- Determine your next steps – should you enlist professional help from a company like Sandhurst Roofing, or are repairs something you can handle yourself?
Role of Other Roofing Materials
While tiles form the primary material in tile roofs, other accessories play critical roles in ensuring the longevity of the roofing system:
- Roof underlayment – This layer sits beneath the tiles and provides an additional barrier between the tiles and decking, offering extra protection against water penetration.
- Flashing – Installed around areas such as chimneys, skylights, vents, and valleys where two roof planes intersect to prevent water ingress at these vulnerable areas.
- Ridge Cap Tiles – Found along ridges where two sides meet; they create a protective barrier against water infiltration along this vulnerable spot.
During repair work, it’s essential to pay close attention to all aspects of the roofing system rather than just fixing or replacing broken tiles.
For example, if you notice the flashing around a chimney is wonky or out of place, it may be time to address this issue. Ignoring flashing issues can lead to severe water damage inside your home, so it’s vital to tackle them as soon as possible.
Similarly, if the underlayment has degraded, it may need replacement. Old and worn underlayment can cause shingles or tiles to fail, which could lead to significant water damage in your attic or home interior.
Taking all these factors into account will ensure that your repair work is thorough and long-lasting. In our next section, we’ll detail preparations necessary before starting repair work.
Preparations before Tile Roof Repair
Tile roofs are known for their durability and aesthetic appeal. However, they can also face damages from various sources, including falling debris or heavy winds. To ensure a successful tile roof repair, preparations need to take place before any intervention. It’s best to evaluate the extent of the damage beforehand to determine if the problem can be solved using DIY methods or professional help is necessary. Most tile roof repairs require specific materials that match the existing ones and specialised tools like pry bars, plastic roofing cement, and roofing nails.
For minor repairs, identify the damaged tiles and scrub them thoroughly before filling and sealing any voids using plastic roofing cement or fibre cement adequately. This process can also involve replacing individual tiles by removing damaged ones with appropriate safety gear and tools.
Once you’ve assessed the damage’s severity, it’s time to focus on selecting the right materials for your surfaces.
Tile roof repairs require careful preparation, evaluation of damage, and the use of specialised tools and materials. Minor repairs can usually be done through cleaning, filling, sealing, or replacing individual tiles. It is important to assess the severity of the damage before proceeding with the repair process.
Surface Assessment and Material Selection
The foundation of any building begins with its roofing system, which plays a vital role in safeguarding the home’s integrity. Therefore, surface assessment becomes a crucial step in ensuring proper tile roof repair procedures.
Let’s assume an instance where a homeowner needs to repair extensive damages caused by falling debris due to extreme weather. Things to look out for are cracked tiles, broken ridges, damaged surface layers beneath the tiling, split battens or rafters or even masonry problems.
In this scenario, repair requires matching existing tiles’ colour and profile type while also focusing on finding high-quality replacement materials with the same design and structure. Material selection may impact durability and prevent issues like fibre cement deterioration.
It’s good practise to inspect replacement tiles carefully before installing them to ensure they’re defect-free.
| Surface Type | Materials Required |
|---|---|
| Tiles | Matching tiles (colour and profile), Fibre Cement Sheet/Fabric, Plastic Roofing Cement, Roofing Nails |
| Felt underlayment | Durable, weather-resistant materials (synthetic underlayment is the best option) |
| Sheathing material | Exterior grade plywood |
| Batten or rafter | Treated and kiln-dried lumber |
Selecting the right contractor for tile roof repairs also plays a crucial role in determining the success of your repair project. Our team of experienced and qualified roofing specialists, including roof plumbers, are always here to help.
Choosing the Right Contractor
When repairs are required, it’s best to consult with professional roofing contractors. Choosing the right contractor for your project comes down to doing your due diligence by researching company reviews, getting multiple quotes, and verifying state licences with the contractor.
For example, if you needed a new tile roof installation or repair in Miami, you could opt for the Top Rated Roofing Miami company that has excellent reviews from past clients. This research can be done by browsing online listings, asking for referrals from family members or friends who have done similar work and visiting trade shows or conferences related to roofing repair.
By finding a reputable contractor upfront, you’ll ensure the craftsmanship of your tile roof repair is high quality while protecting your investment in the long-term.
The Tile Roof Repair Process
The tile roof repair process typically involves identifying the problem areas and then fixing them based on specific techniques and procedures. As mentioned earlier, hiring an experienced roofing contractor is essential as they will understand these techniques and identify solutions tailored specifically to address any issues related to your needs, budget, and residential situation.
Think of it like taking your car into a dealership – experienced professionals perform thorough diagnostics on identifying problems before outlining solutions based on best practises.
Typically, common issues could include damaged tiles, fibre cement deterioration or masonry problems. Fortunately, materials required for tile roof repairs aren’t specialised tools like pry bars, plastic roofing cement, roofing nails among others.
| Tools And Materials Needed |
|---|
| New tiles that match existing ones |
| Specialised tools (pry bars) |
| Plastic roofing cement |
| Roofing Nails |
When repairing small cracks or holes in tile roofs with plastic roofing cement or fibre cement: Identify damaged areas by scrubbing them thoroughly to remove any debris before filling and sealing voids properly.
For replacing broken tiles, carefully remove damaged tiles using appropriate safety gear and tools. Before installing new replacement tiles, inspect them for defects. Always remember the golden rule: When unsure or uncomfortable working at heights, seeking professional help from roofing contractors can save time and provide high-quality results.
Fixing and Replacing Broken Tiles
Tile roofs are known for their durability and aesthetic appeal. However, over time, they are subject to exposure to the elements that can lead to chipping, cracking or breaking of tiles. When such damage occurs, it’s essential to replace the tile immediately to prevent water from penetrating the roof base or bedding and causing further damage.
Homeowners should be on the lookout for damaged or broken tiles and initiate repairs as soon as possible. Signs of a failing tile roof may include cracked or missing tiles, moss or algae growth, loose flashing, and leaks inside the house.
Fortunately, replacing broken tiles is relatively straightforward, and homeowners with adequate DIY skills can comfortably undertake this task. The first step involves locating the broken tile(s) by visually inspecting the roof; careful attention must be paid to every nook and cranny of the roof surface. When found, carefully lift any surrounding tiles with a pry bar and unfasten all roofing nails that hold down the damaged tile.
Once removed safely without disturbing any remaining tiles’ stability, inspect new replacement tiles for defects before installing them correctly using specialised tools like plastic roofing cement and roofing nails.
Tile Replacement Process:
- Locate damaged/broken tile
- Remove surrounding tiles with pry bar
- Unfasten roofing nails holding down damaged tile
- Inspect new tile for defects
- Instal new tile using plastic roofing cement & roofing nails
Addressing Ridge, Hip and Shake Tiles Issues
Ridge, hip, and shake tiles contribute significantly to a roof’s structural integrity while enhancing its overall appearance. Their role in the roofing system is critical; hence damages could lead to issues that require immediate attention.
The issues usually encountered with these types of tiles include deterioration due to age-related wear and tear or exposure to harsh climatic conditions. Fortunately, most issues are fixable:
Dealing with hip and ridge tiles may require the application of new mortar into any damaged areas in the existing ones. This repair process requires experience, making it essential to enlist professional roofers.
For shake tiles, breakages caused by falling objects or high winds can be acute; hence a roof inspection is necessary to determine if full replacement is necessary.
Homeowners are also advised to keep an eye out for potential ridge cap issues such as improper installation or ill-fitting materials as these could lead to unwanted leaks in their homes.
Ultimately, while addressing tile roofing issues can be overwhelming, seeking professional help from roofing contractors can save time and provide high-quality results tailored specifically to your home’s needs while ensuring safety throughout the entire process.
Addressing Common Questions on Tile Roof Repair
Tile roofs have been around for centuries and are popular for their durability and aesthetic appeal. However, just like any other type of roofing, tile roofs may experience problems beyond simple wear and tear. Damaged tiles, fibre cement deterioration, masonry problems, leaks hidden under individual tiles – these are just some of the common issues homeowners face.
Tile roof repair is a daunting task that requires specialised tools, materials, and expertise. Many homeowners have numerous questions about how to proceed with this complex process. To help clarify some common tile roof repair doubts, we answer frequently asked questions (FAQs) below.
Q: I think my tile roof has sustained damage. What should I do? A: First things first – inspect your roof from ground level for any visible damage such as missing or broken tiles. Check gutters and downspouts to see if they have become clogged with broken pieces of the tile. If you notice any signs of significant damage or leaks in your attic or ceiling, consider calling a professional roofer.
Q: Do I need to replace my old tile roof completely? A: Not necessarily. If you’re experiencing a genuine problem, consult a professional roofing contractor for advice on whether repair or replacement would be more suitable.
Q: Are there DIY solutions to repairing half-broken tiles? A: While tiling repairs can be accomplished at home using plastic roofing cement or fibre cement, it’s not recommended for most homeowners. It’s best to consult professional roofing contractors if unsure about how to proceed or uncomfortable working at heights.
Q: How do you replace an entire section of a damaged tile roof? A: It’s often not necessary to replace an entire section but rather the individual broken tiles that are causing issues. Carefully remove the damaged tile(s), taking care not to damage the surrounding tiles. Check for any signs of wear and tear or degradation in the roofing underlayment and fix it where necessary. Finally, instal new roof tiles correctly, making sure they match the existing tiles, to avoid mismatched appearances.
Q: Can I handle tile roof repair on my own? A: While some homeowners may feel confident enough about fixing minor issues themselves (such as a single broken tile), it’s essential to consider the risks involved with DIY work, especially when working at height and handling specialised tools.
Some things to keep in mind when considering DIY repairs are that improper installation can pose dangers to the anyone living inside the house if not done right. There’s also a risk of substandard performance due to a lack of experience and equipment. On the other hand, professional roofing contractors have years of experience handling similar problems and come equipped with industry-grade machinery tailored specifically for this type of job. They know what remedy will yield long-lasting results and will do so while keeping safety in mind during the entire process.


